DIY Projects: How to Make Tissue Paper Candles
Posted: December 14, 2015 | Author: Southern Utah University | Read Time: 1 minutes
 Supplies
- White or light colored pillar candle
- White tissue paper
- Colored pencils or markers
- Scissors
- Waxed paper
- Hot hair dryer or multipurpose heat tool
Candle Making Steps
- Cut a piece of waxed paper an inch or two taller than the candle, and long enough to wrap around and overlap the candle about four inches. Set this aside, you will use it later.
- Next cut a piece of white tissue paper. It should be slightly shorter than the candle and should be able to wrap around it with a tiny overlap. Make sure to cut a few extra pieces of tissue paper in case your child wants to start over.
- Let your child draw on the tissue paper using markers or colored pencils. The tissue paper is delicate so instruct your child to draw carefully. For younger children it might help to cut a larger piece of paper and tape it down to your drawing surface for stability. Then cut it to size once the drawing is complete.
-
When the drawing is complete, carefully wrap the drawing around the candle.
- Next, hold the tissue paper in place around the candle and wrap the waxed paper around it. The waxed paper acts as a handle to hold everything tightly together.
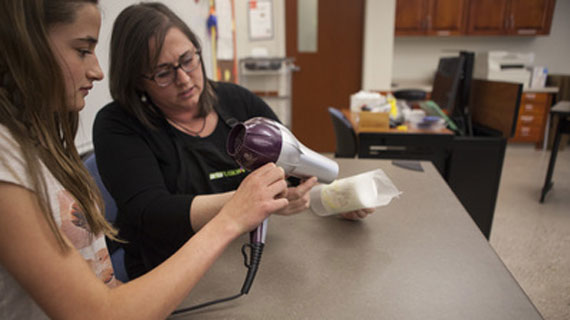
- Use a hair dryer on the hottest setting to heat up the candle. Move the dryer around slowly, heating one small area at a time. You’ll be able to see when the wax is melting because the image will become a bit clearer. Continue heating the candle until every part of the image is melted.
- Finally, carefully pull off the waxed paper and throw it away. Your candle is finished.
This article was published more than 3 years ago and might contain outdated information or broken links. As a result, its accuracy cannot be guaranteed.